- Introduction
- System Configuration and Environmen Setup
- Using the Job Feature
- Combination with the Calendar Feature
- Summary
- Other Startup Articles
- Contact Us
| Publish Date | 2017/12/26 |
|---|
Introduction
About this Series
This series provides information about the set-up procedures and the basic how-to of Hinemos. This series is intended for new users who are not familiar with its capabilities.
By following the tutorial of this series, it will provide you with the first steps for mastering Hinemos.
For the basic description of Hinemos, please see here.
Our first tutorial “Introduction (1) Getting Started with Hinemos” explained the set-up procedures and the basic how-to of Hinemos. The second tutorial “Introduction (2) Monitoring with Hinemos” explained how to configure the monitor setting and to check the monitor results.
Prerequisite
This tutorial assumes that you have an environment created from the previous tutorial “Introduction (1) Getting Started with Hinemos”.
Notices
The version number of Hinemos (6.0.*) which appear in this tutorial shall be replaced as necessary with the version you are using.
Disclaimer
We will not be responsible for any loss or damage that may result from the use of this tutorial or any software introduced in this tutorial.
Environment Setup
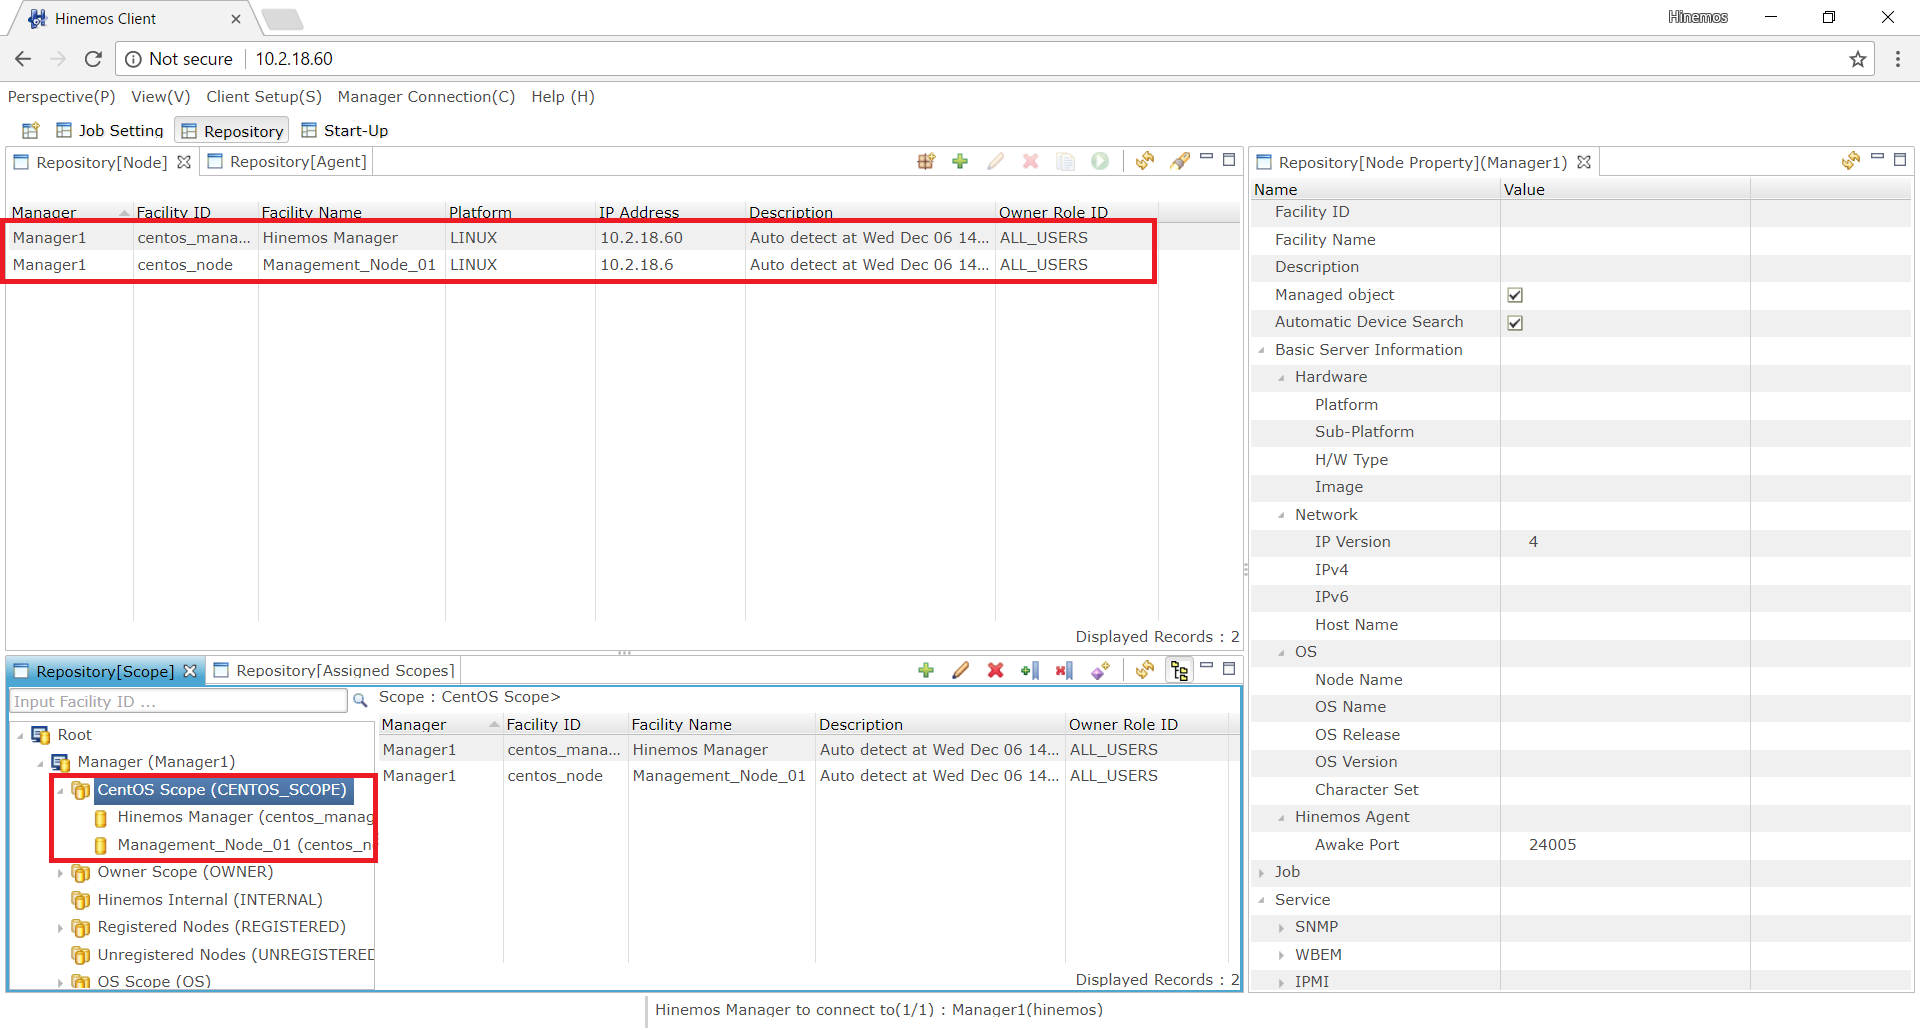
We will be using the Hinemos Manager and the managed nodes created in introduction (1). Please refer to the “System Overview” section of the previous tutorial regarding the IP addresses and the system configuration, and the “2. Registering the managed nodes” and “3. Creating a scope” section for the node and scope. In this tutorial, we have setup the managed nodes and the scope as displayed below.
↓Click to enlarge↓
Installing the Hinemos Agent
In order to use the job feature, users are required to install and have a running Hinemos Agent on their target machine. The procedures for installing Hinemos Agent on a Linux environment are explained below.
1. Download and place the “hinemos-6.0-agent-6.0.0-1.el.noarch.rpm” on “centos_node”.
2. Log in to “centos_node” as a root user.
3. Install the package using the rpm command. If you placed the package under /root directory, execute the following commands.
        [root]# cd /root
        [root]# rpm -ivh hinemos-6.0-agent-6.0.0-1.el.noarch.rpm
        Preparing... ################################# [100%]
        Updating / installing...
        1:hinemos-6.0-agent-0:6.0.0-1.el ################################# [100%]
        Redirecting to /bin/systemctl status rsyslog.service
        Redirecting to /bin/systemctl restart rsyslog.service
That is all for the installation. Use the service command and start Hinemos Agent.
        [root]# service hinemos_agent start
        Starting hinemos_agent (via systemctl): [ OK ]
        [root]#
The message above indicates that Hinemos Agent started successfully.
 InfraManagement
- ◆This feature allows construction of an environment for a node by executing processing, such as distributing files to two or more nodes through a single operation or executing commands. Please see here for more details on this feature.
Running Jobs with Hinemos
This tutorial will provide you with the basic information about the job feature, along with the procedures for registering and running jobs with Hinemos.
Overview of Job Feature
The job feature of Hinemos is defined as a feature which execute specified commands/scripts on machines which are registered as a node on Hinemos. The jobs can be set to run during specific time or on a schedule, such as every day or every hour, enabling automation of daily tasks.
Creating Jobs
In this tutorial, we will setup a Job Unit, Job Net, and Command Job as illustrated below.
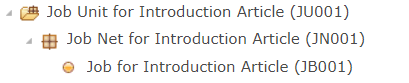
- ◆Job Unit: The Job Unit is the top element of the job hierarchy. All Job Nets and Command Jobs are created under the Job Unit. It is necessary to create a Job Unit before registering any Job Nets or Command Jobs.
- ◆Job Net: May include and handle numerous Job Nets and Command Jobs.
- ◆Command Job: It is the smallest component of the jobs. The command/script to be executed on the managed node will be set on the Command Job.
Creating a Job Unit
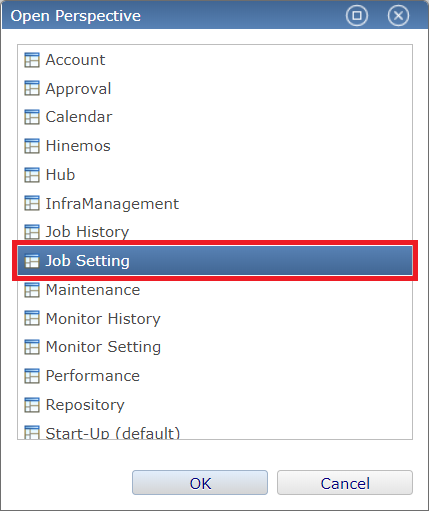
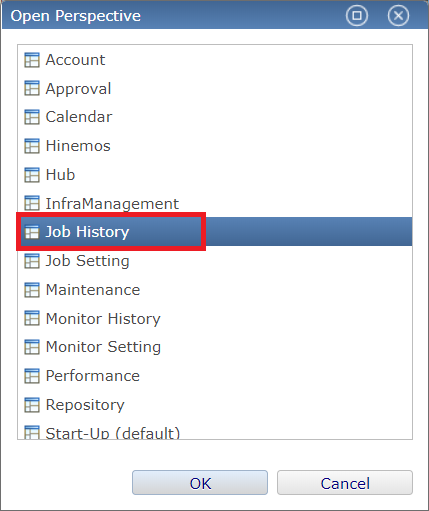
1. Start Hinemos Client and open the “Job Setting” perspective.
↓Click to enlarge↓
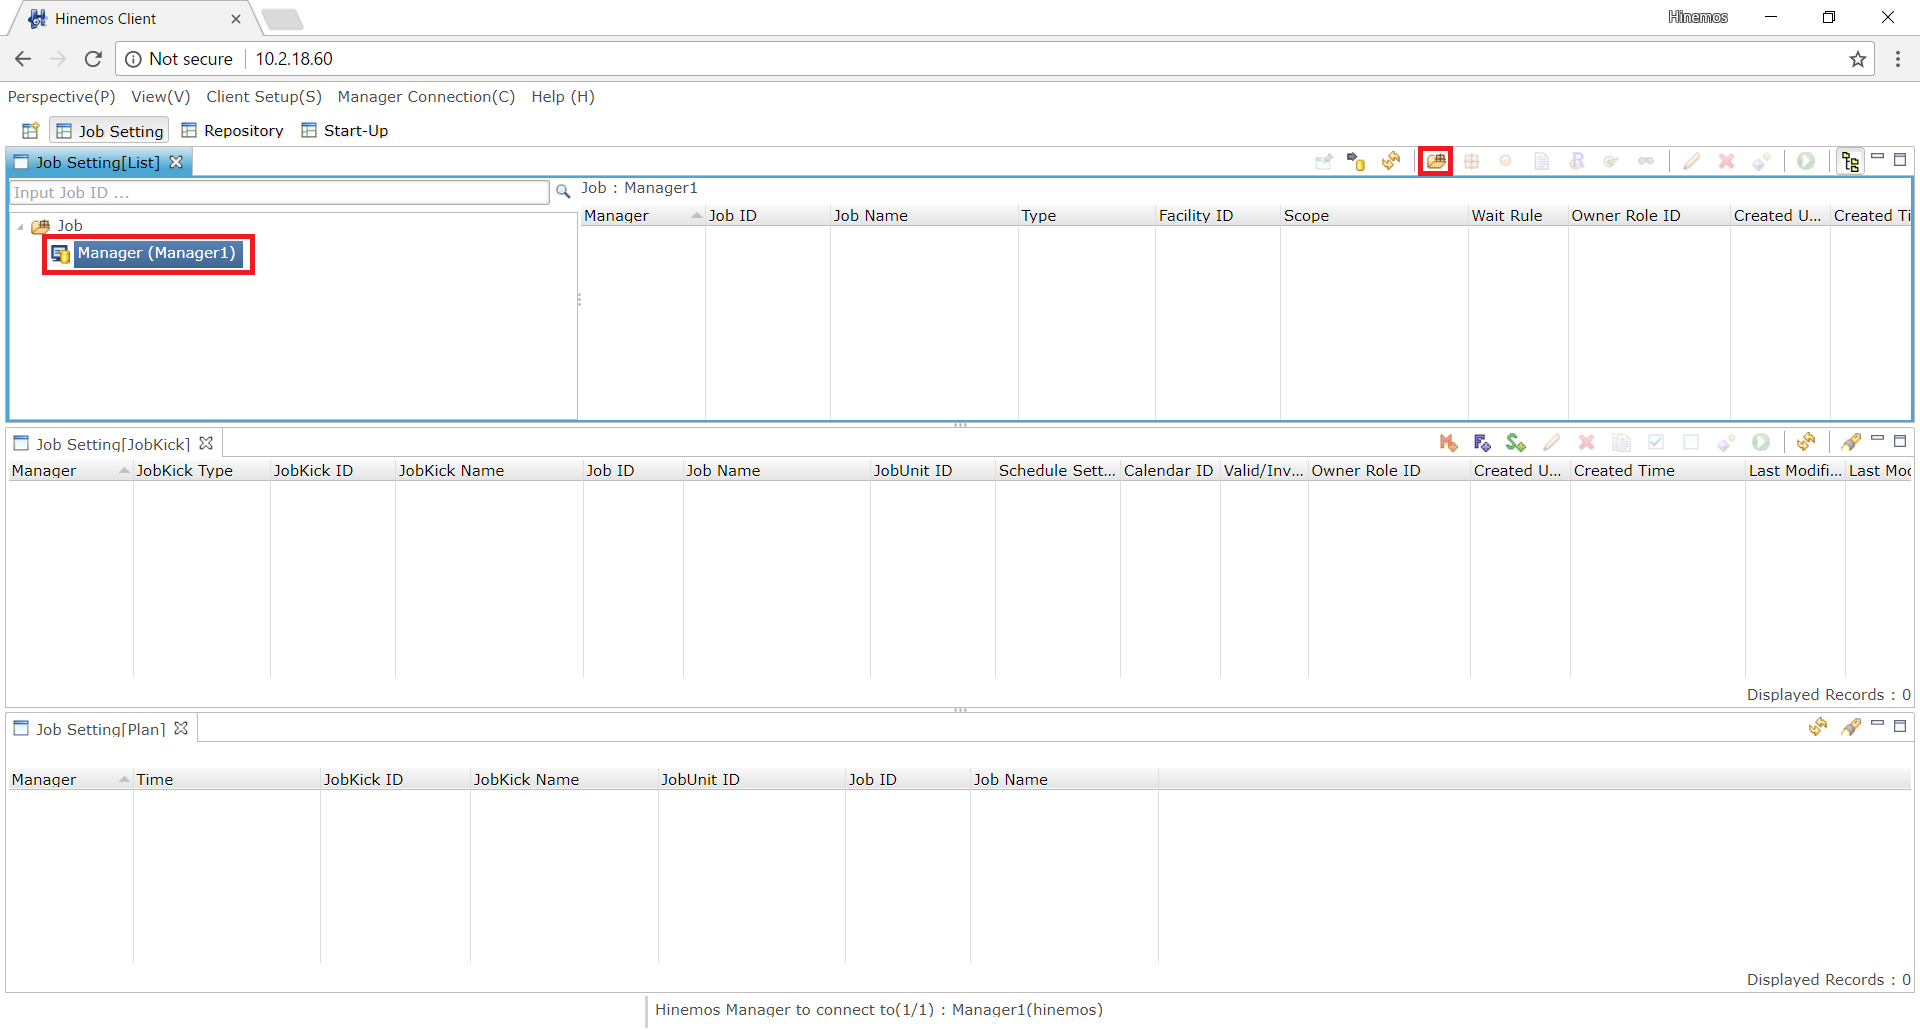
2. Select the “Manager” listed under the scope tree and press the “Create JobUnit” button.
↓Click to enlarge↓
3. The required fields in the Job[Create/Modify JobUnit] dialogue will be displayed in pink background. Specify the “Job ID” and “Job Name” and press the “OK” button.
↓Click to enlarge↓
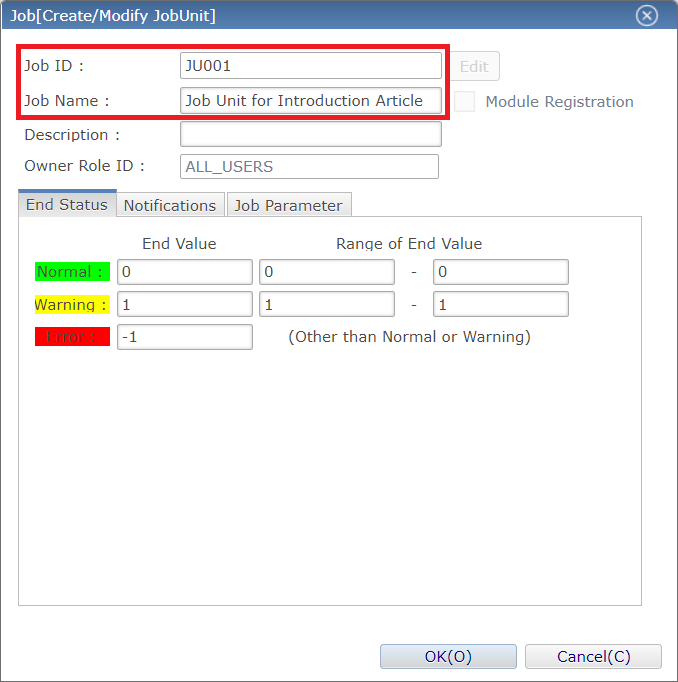
- ◆Job ID: A unique string given to identify each Job Unit, Job Net, and Command Job.
- ◆Job Name: A string given to the jobs. Users may specify any name for the Job Name.
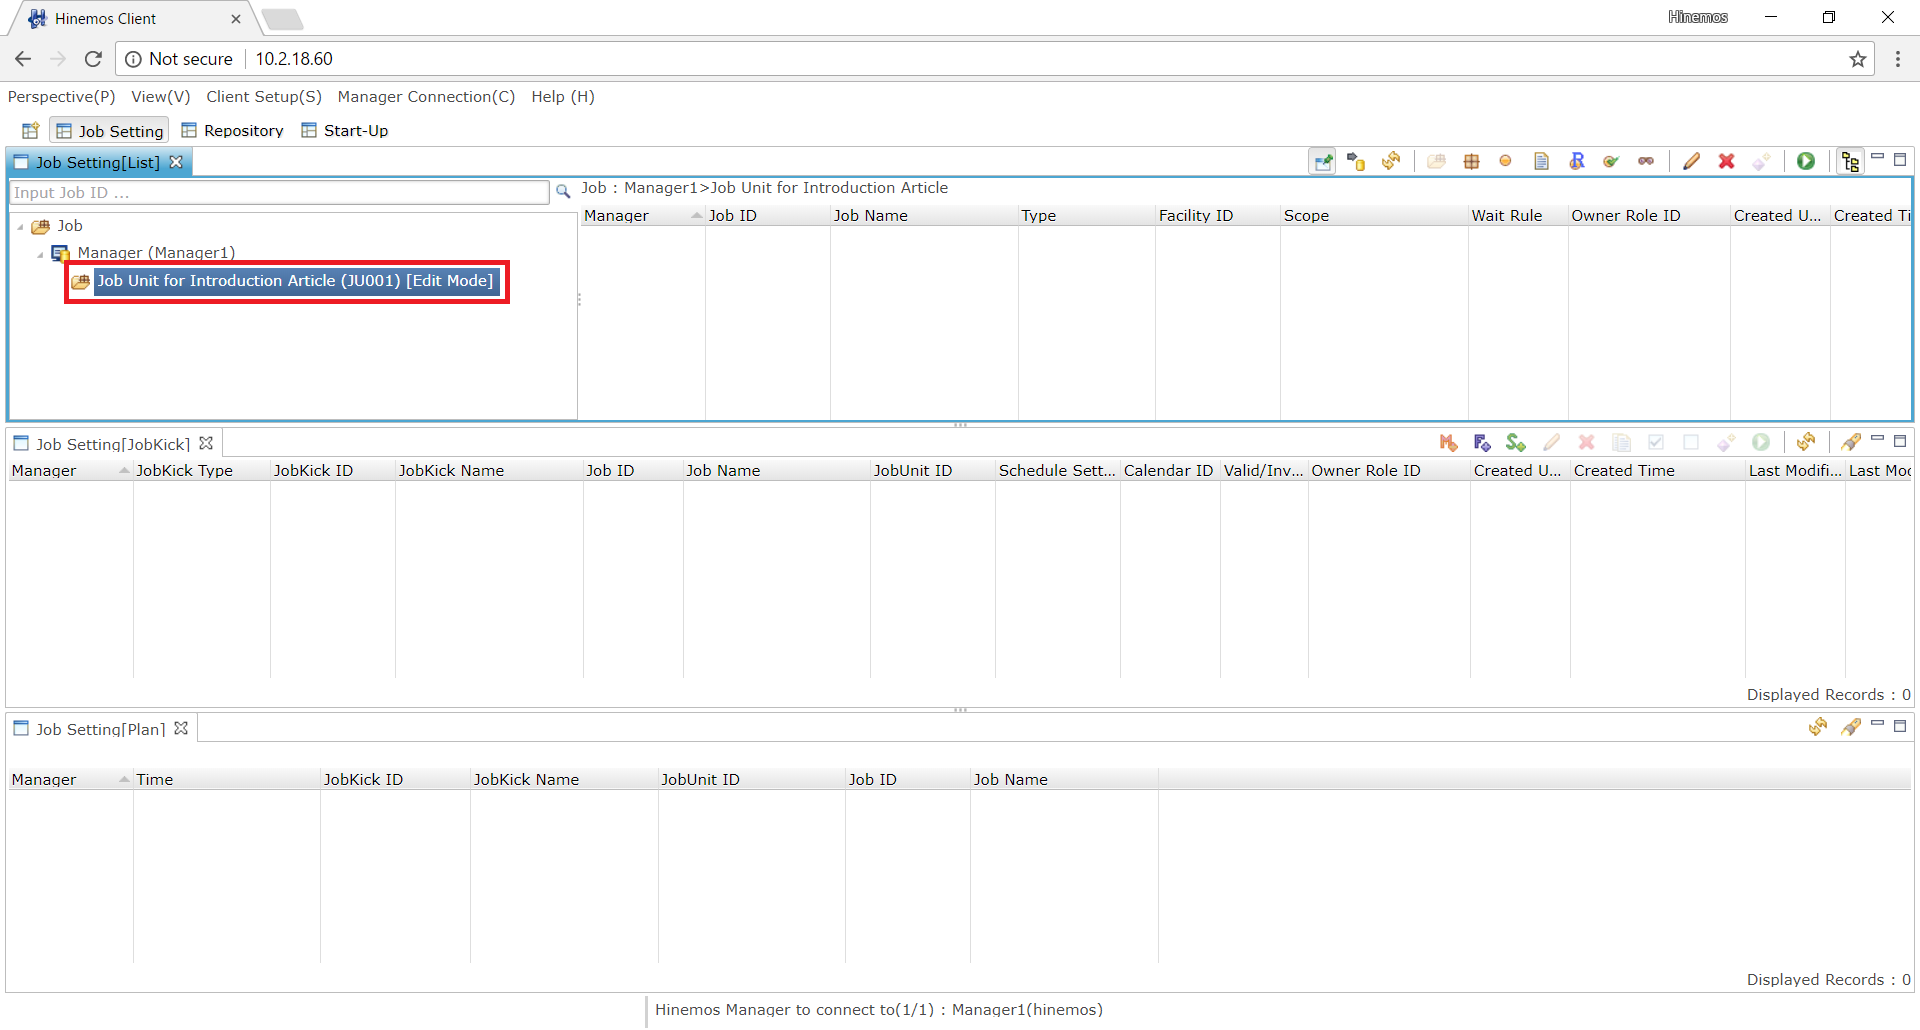
Now let’s create a Job Net under the Job Unit we have just created.
Creating a Job Net
. Select the “Job Unit” and press “Create JobNet” button on the top right corner of the “Job Setting[List]” view.
↓Click to enlarge↓
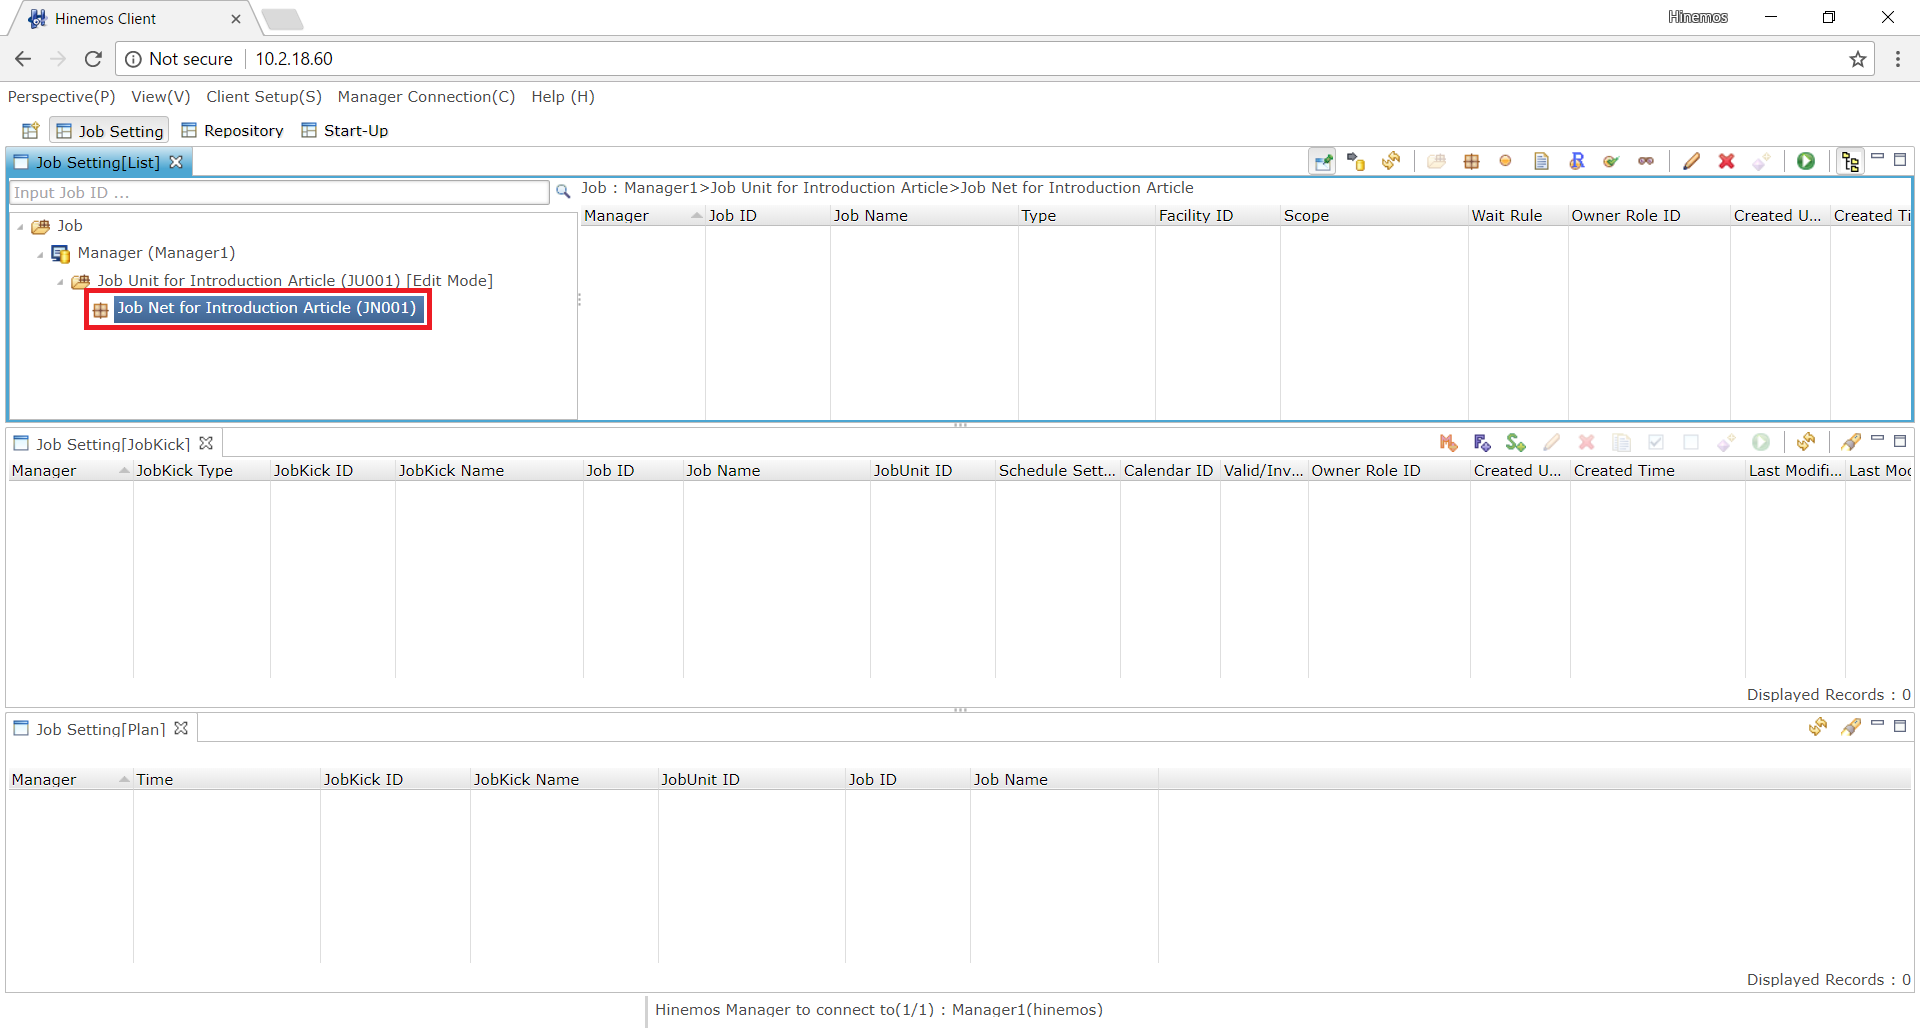
2. Specify the “Job ID” and “Job Name” in the Job[Create/Modify JobNet] dialogue and press the “OK” button.
↓Click to enlarge↓

Now let’s create a Command Job under this Job Net.
Creating a Command Job
1. Select the “Job Unit” and press “Create Command Job” button on the top right corner of the “Job Setting[List]” view.
↓Click to enlarge↓
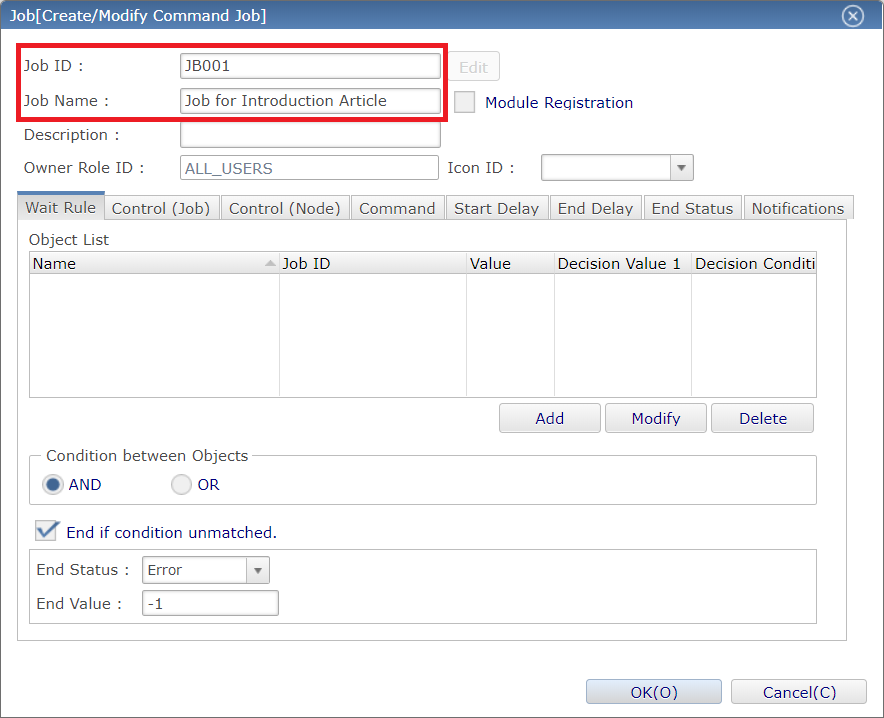
2. The required fields in the Job[Create/Modify Command Job] dialogue will be displayed in pink background. Specify the “Job ID” and “Job Name”.
↓Click to enlarge↓
↓Click to enlarge↓
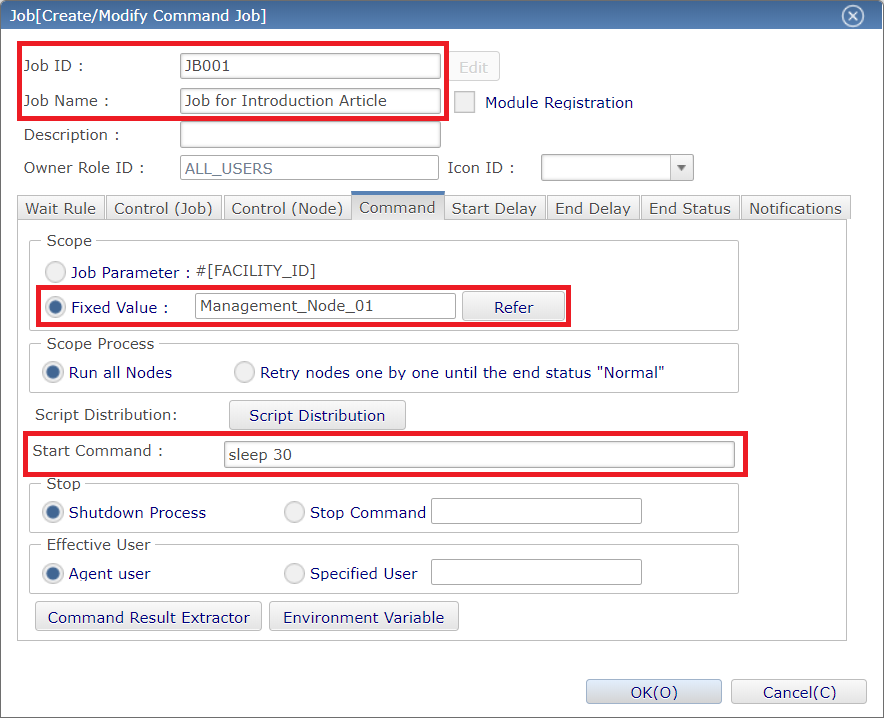
- ◆Scope: Select the target scope or managed node of the command/script.
- ◆Start Command: Specify the command/script to be executed on the managed node.
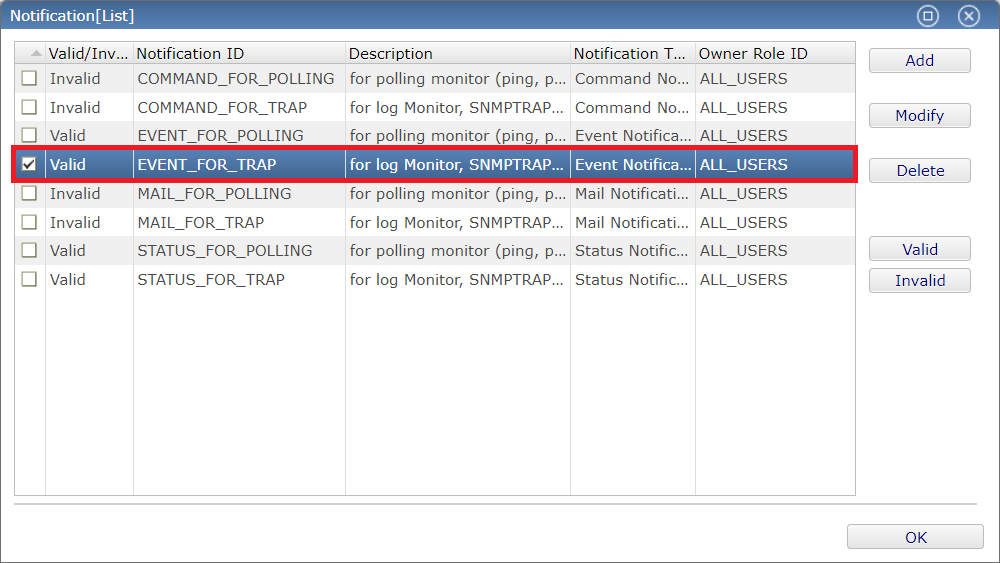
4. Open the “Notification” tab to specify the notification method. Select “EVENT_FOR_TARP” and press the “OK” button.
↓Click to enlarge↓
5. Press the “Register” button on the top right corner of the “Job Setting[List]” view to register the jobs to the database of Hinemos.
↓Click to enlarge↓
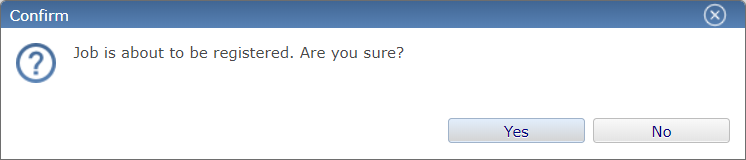
That is for the registration of the jobs. The next steps will explain you how to run these jobs.
About the “Edit Mode” and “Register”
- ◆When modifying an existing job setting, you will fist enter “Edit Mode” and then “Register” or “Cancel” any changes. This “Edit Mode” prevents several users to modify the same setting under the Job Unit at the same time.
Starting a Job Manually
To start a job manually, select a Job Unit, Job Net, or the Command Job and press the “Run” button on the top right corner of the “Job Setting[List]” view.
↓Click to enlarge↓
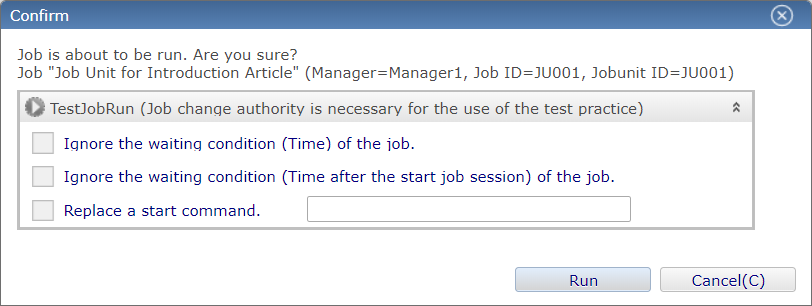
Test Job Run
- ◆You can start a job manually from the dialogue above. You can also change the behavior of the jobs by checking the conditions of each check-box. With this setting, you may test the flow of the jobs without modifying the actual setting.
Confirming the Job Result
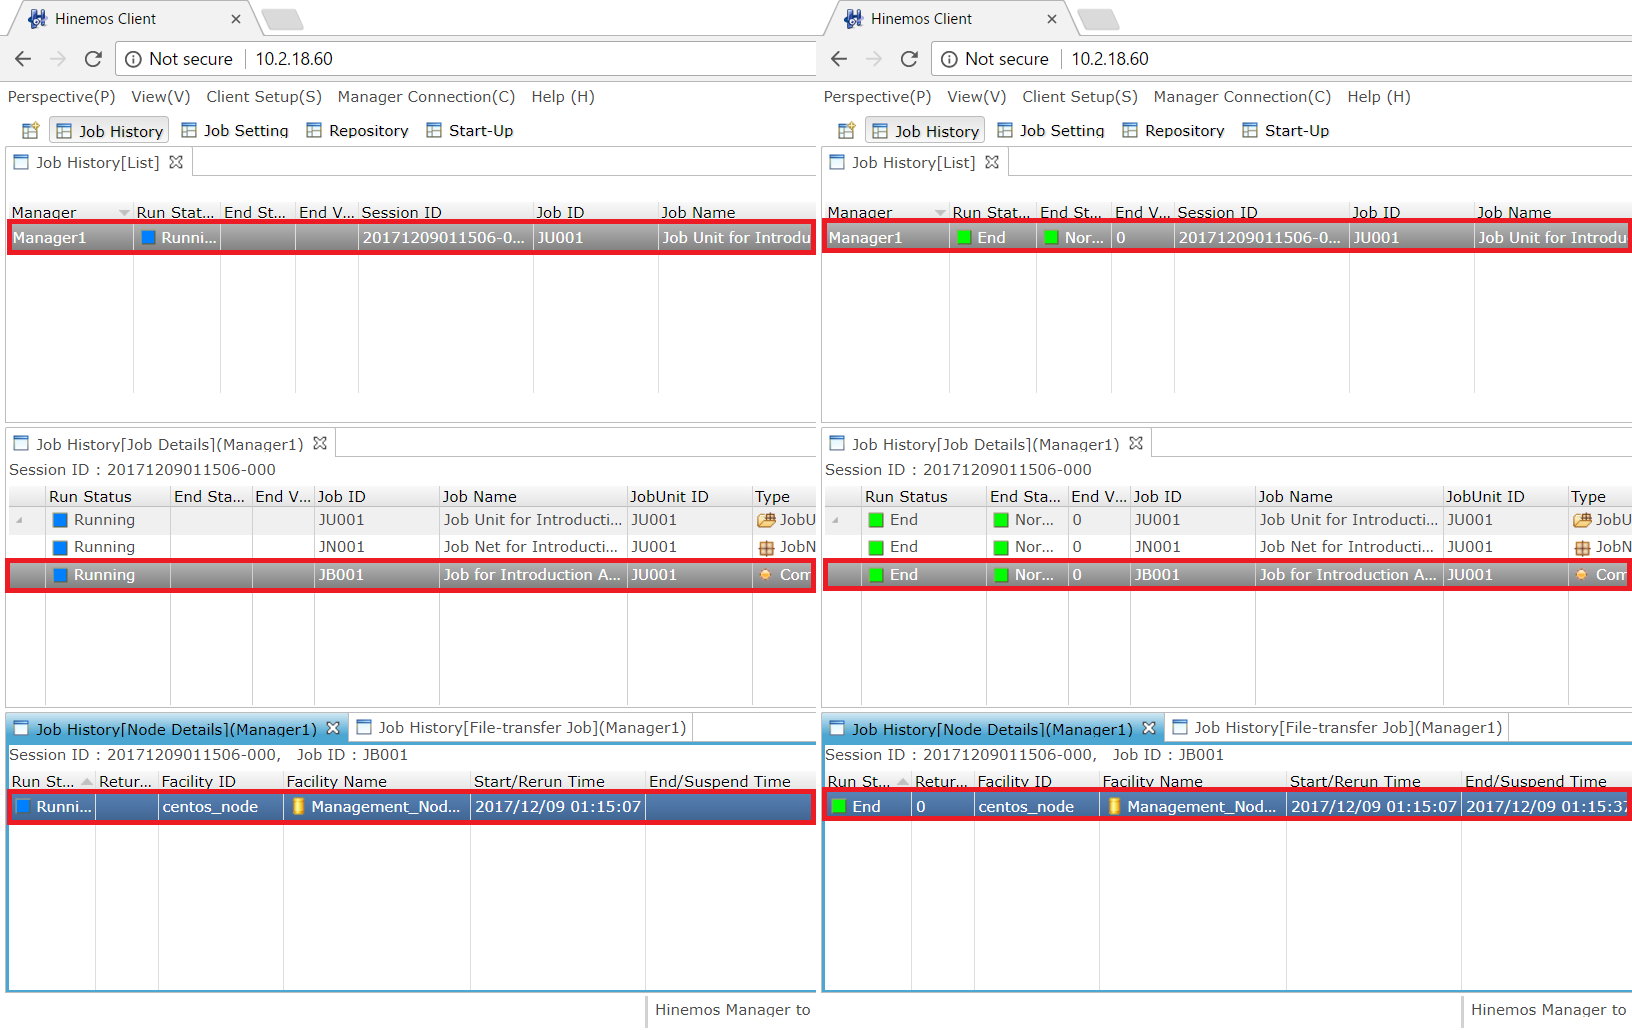
The results of the executed jobs can be confirmed the from the Job History perspective.
↓Click to enlarge↓
In the “Job History[List]” view, you can see the results of the executed jobs, or the current status of the running jobs. By selecting a job from in the “Job History[List]” view, the details will be displayed in the “Job History[Job Details]” view. Similarly, by selecting a job from in the “Job History[Job Details]” view, details (by each node unit) will be displayed in the “Job History[Node Details]” view.
↓Click to enlarge↓
For sophisticated job operation
- ◆In the “Wait Rule” tab, you may specify the conditions which will start the job. This setting will allow users to control the sequences of the jobs. Note that jobs without any wait rule will be executed concurrently.
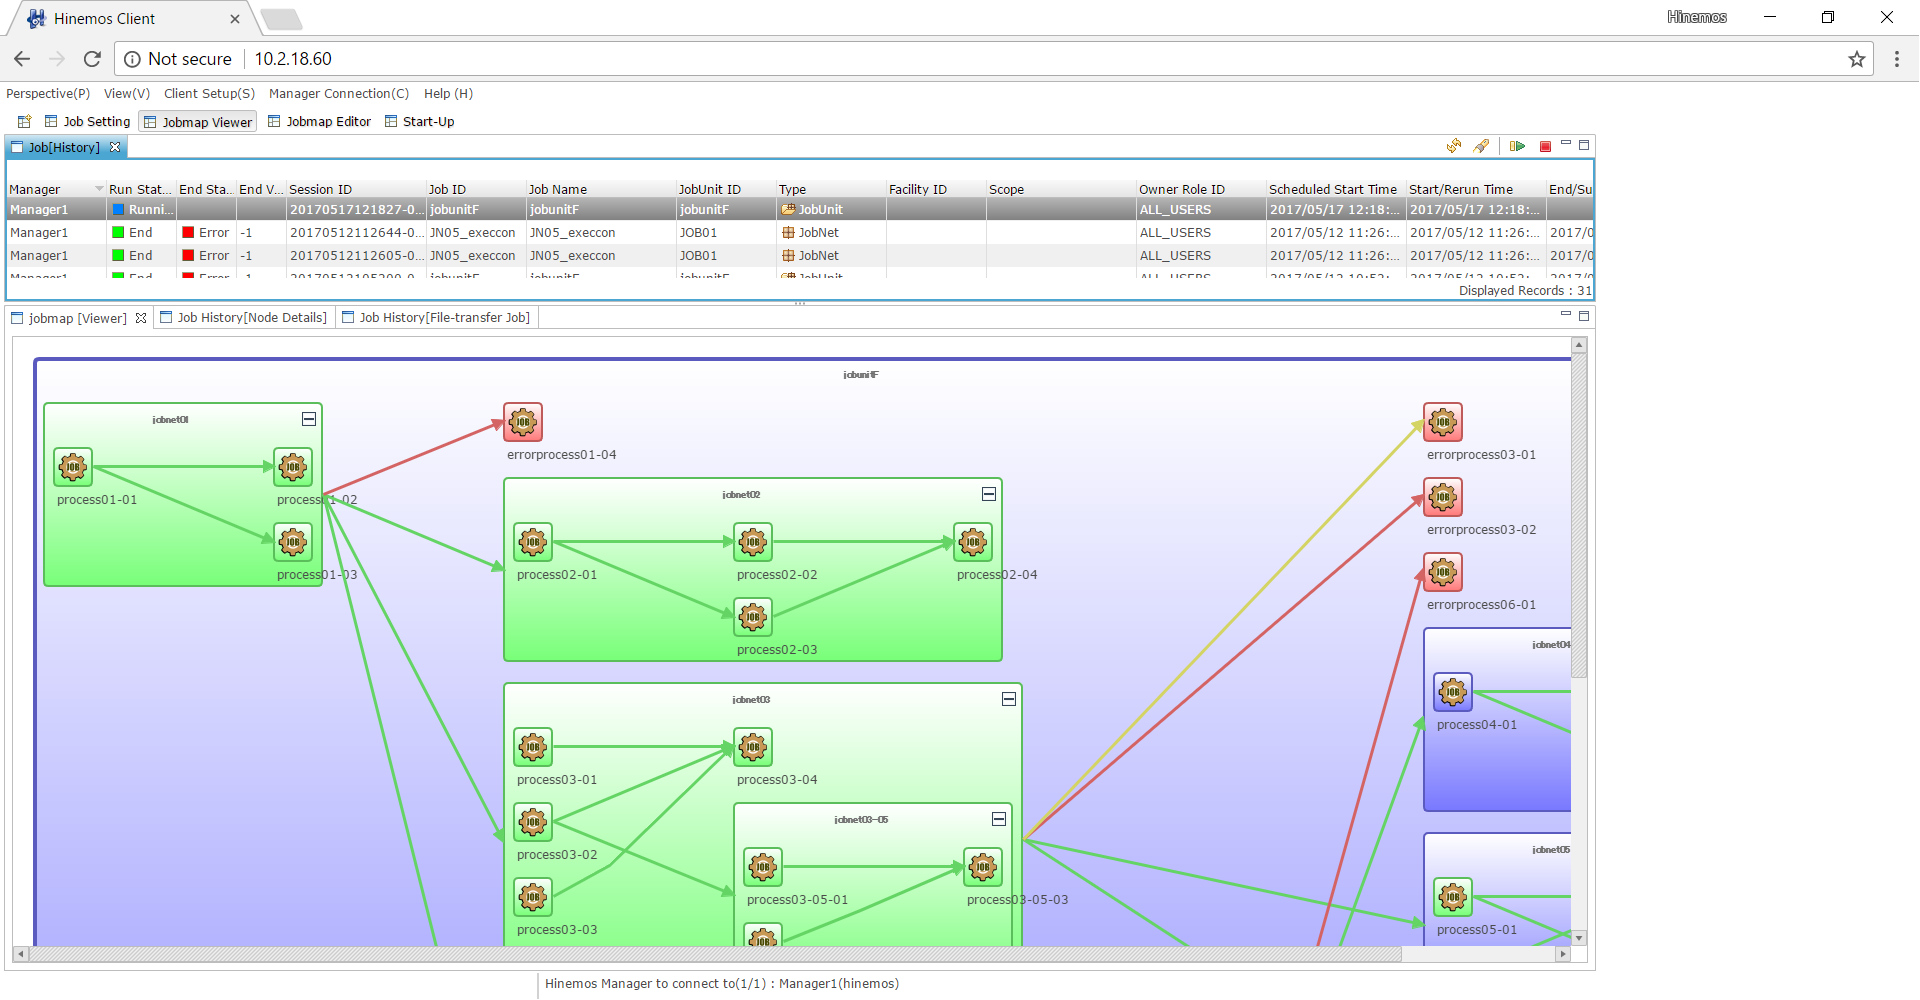
JobMap Feature (Enterprise Option)
- ◆The JobMap feature, included in the enterprise option, enable enhanced "visualization" of jobs by illustrating the relationship and transitions between each job. Please see here for more details.
↓Click to enlarge↓
Combining with the Schedule Feature
The schedule feature allows the users to specify the timing of the job execution.
Setting of the Schedule
Let’s create a schedule like below.
- ◆Run “Job Net for Introduction Article (JN001)” every day at 01:30 A.M.
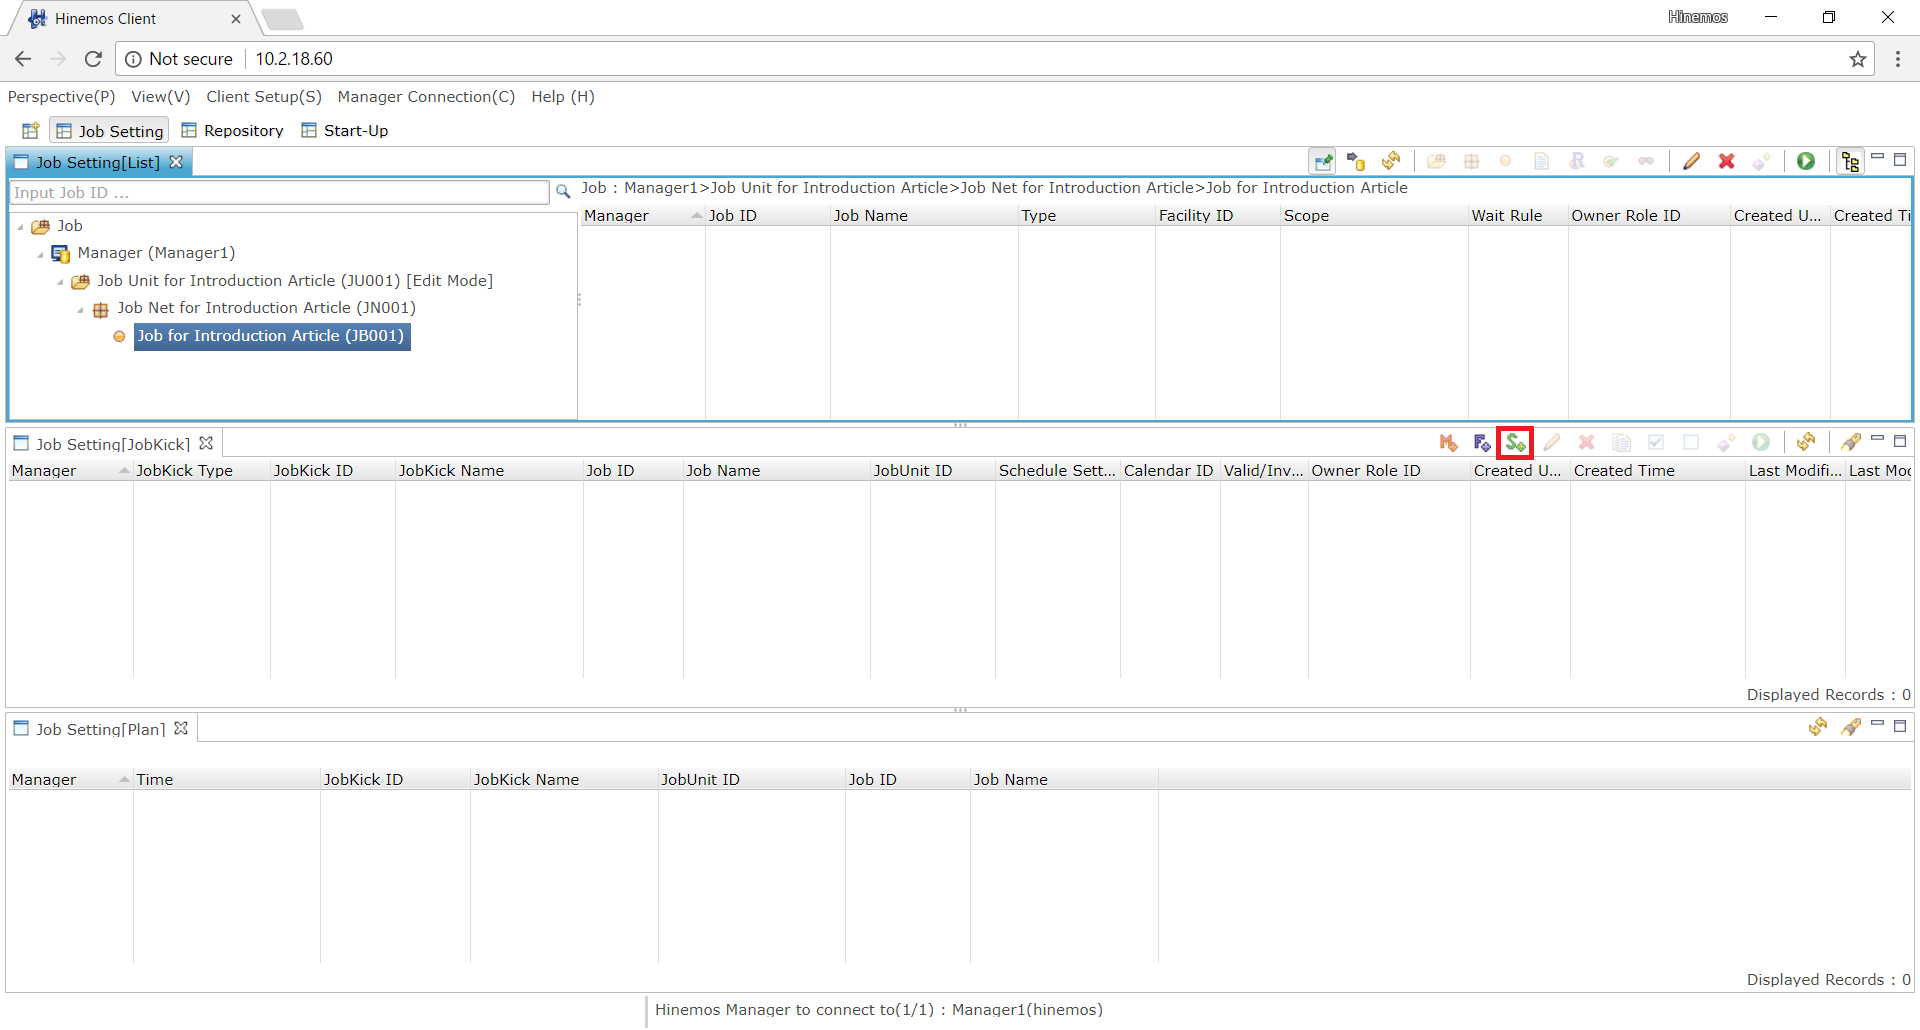
Creating the Schedule
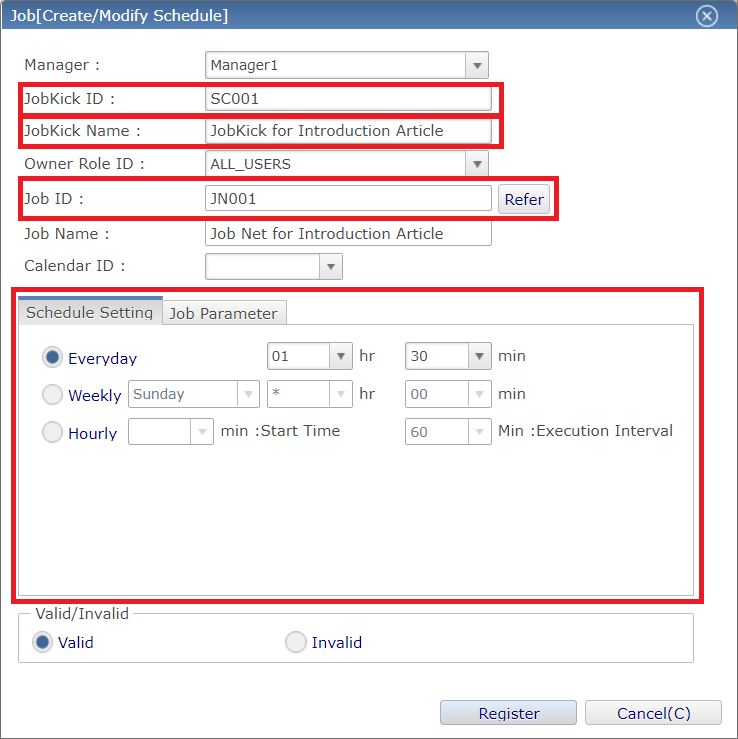
First, press the “Create Schedule” button on the top right corner of the “Job Setting” perspective.
↓Click to enlarge↓
- ◆JobKick ID: A unique string given to identify each trigger.
- ◆JobKick Name: A string given to the triggers. The user may specify any name for the trigger.
- ◆Job ID: Specify the Jon Unit, Job Net, or the Command Job.
- ◆Schedule Setting: Specify the timing of the job execution.
↓Click to enlarge↓
For sophisticated job operation
- ◆Hinemos is equipped with a feature called the calendar feature which enable users to apply calendar such as your own business hours. This setting will allow users to configure the conditions of the jobs in further detail.
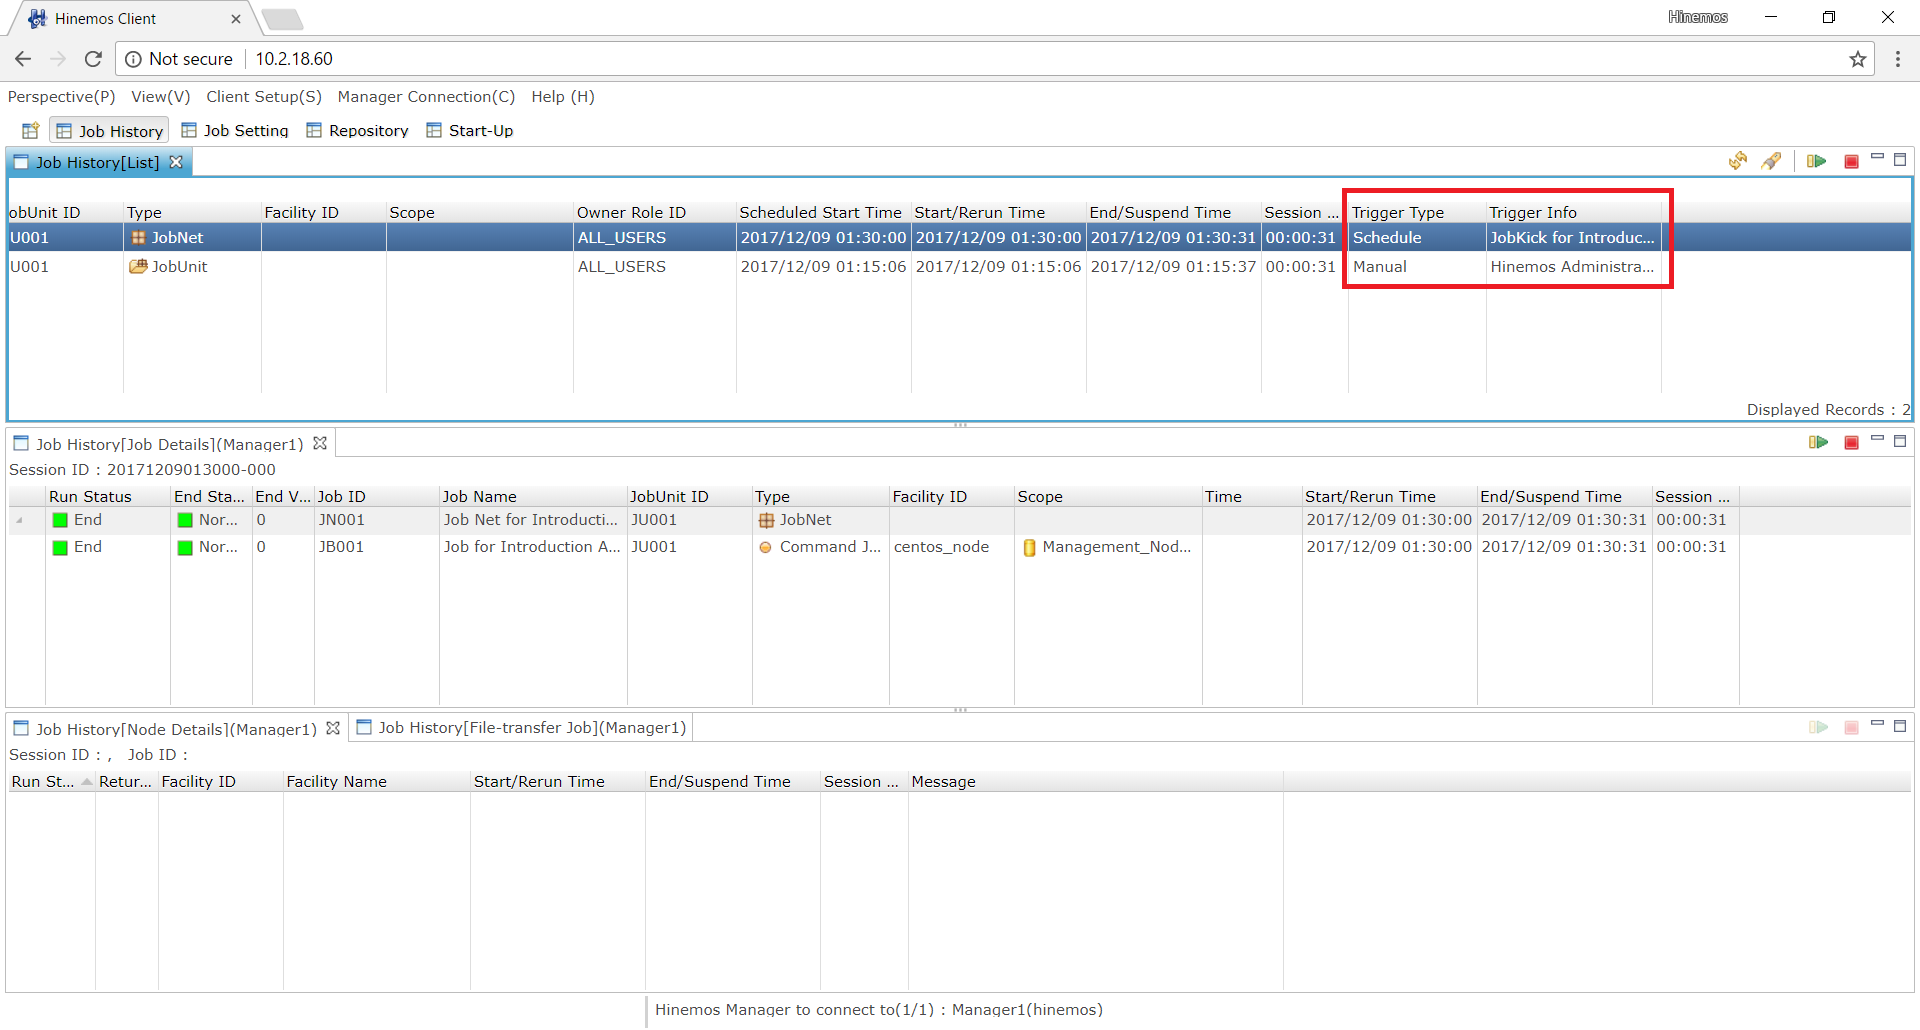
Confirming the Job Result
Like the jobs which were executed manually, the results can be confirmed the from the Job History perspective. The trigger type will be displayed as "Schedule" to indicate the job has been executed by the trigger of the schedule setting.
↓Click to enlarge↓
Summary
Introduction (3) introduced you the job feature of Hinemos. By following this tutorial, we hope you have understood the basic operation (registering/executing) of the job. Also, the calendar feature allows the user to execute jobs along a more complex schedule setting.
Other Startup Articles
Hinemos ver.6.0 Introduction(1) Getting Started with Hinemos
Hinemos ver.6.0 Introduction(2) Monitoring with Hinemos
Contact Us
